Web Thermostat
(2011-2012)
Web interface to my house thermostat. Again this was in the early days before the cheap raspberry pi hit the scene. I wanted to be able to turn on/off my central heating over the internet back in 2011 and this page describes how I made that happen.
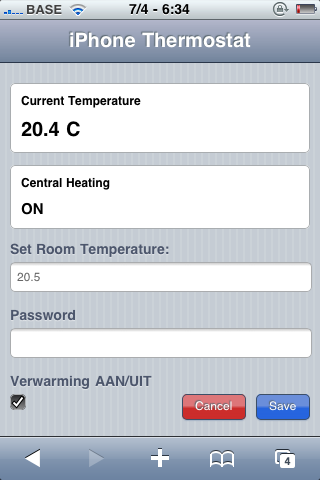
On the left you see the minimal but verry handy gui/web page that allowed me to control my central heating. How was this done without a raspberry pi? Back then I did have a bit more expensive but also cool embedded computer called a SheevaPlug which also ran linux. Together with some electronics I prototyped my first internet controlled central heating hack. Basically like google NEST and various others nowadays. But way back before any existed as a commercial product.
Now because the SheevaPlug computer does not have gpio lines exposed and ready for connecting hardware it's a bit more involved. Arduino came to the rescue here. By using an arduino I only needed to make a small serial protocol and then connect the arduino over usb to the SheevaPlug. The SheevaPlug ran an embedded linux distrubition and once it was booted it basically did a few things. First it read the current temperature and displayed this on the page. It also read out the relay state showing if the heater was switched on or off at present. Finally it allowed to set a new target temparature. Again this was transferred over usb via a serial protocol running at 9600bps.
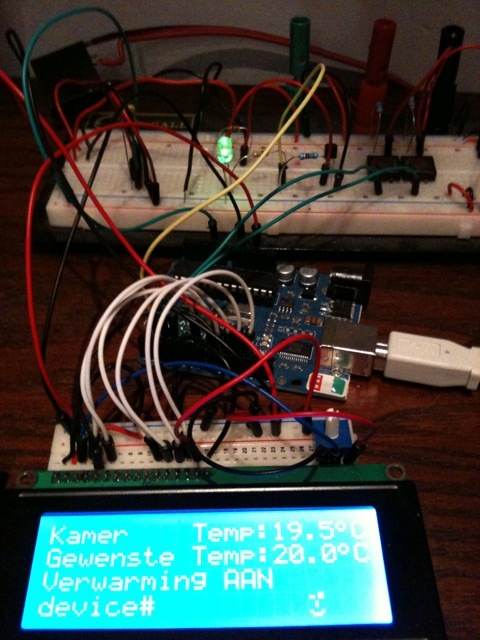
On the right is a picture of the original prototype with breadboard, arduino etc. A big ball of wires. But it did work and looked super geeky in my living room ;).
Basically we have an arduino hooked up to a lm35 temperature sensor and relay. Through the ftdi chip it has a serial connection to a SheevaPlug Plug computer. On this arm based plugpc runs a little perl script that does the serial talk to the arduino to set/get the temperature. The arduino just switches on/off a relay which controls the central heating. There are 2 buttons to inc/dec the wanted temperature. Or it can be set with the web interface.
This system ran in my house for about a year. But then it was time to make a more clean version of it. The concept was nice enough. The PID control was tuned so that my heating would turn/off nicely. And because I could switch it off when I was away for work it actually really reduced my heating bills.
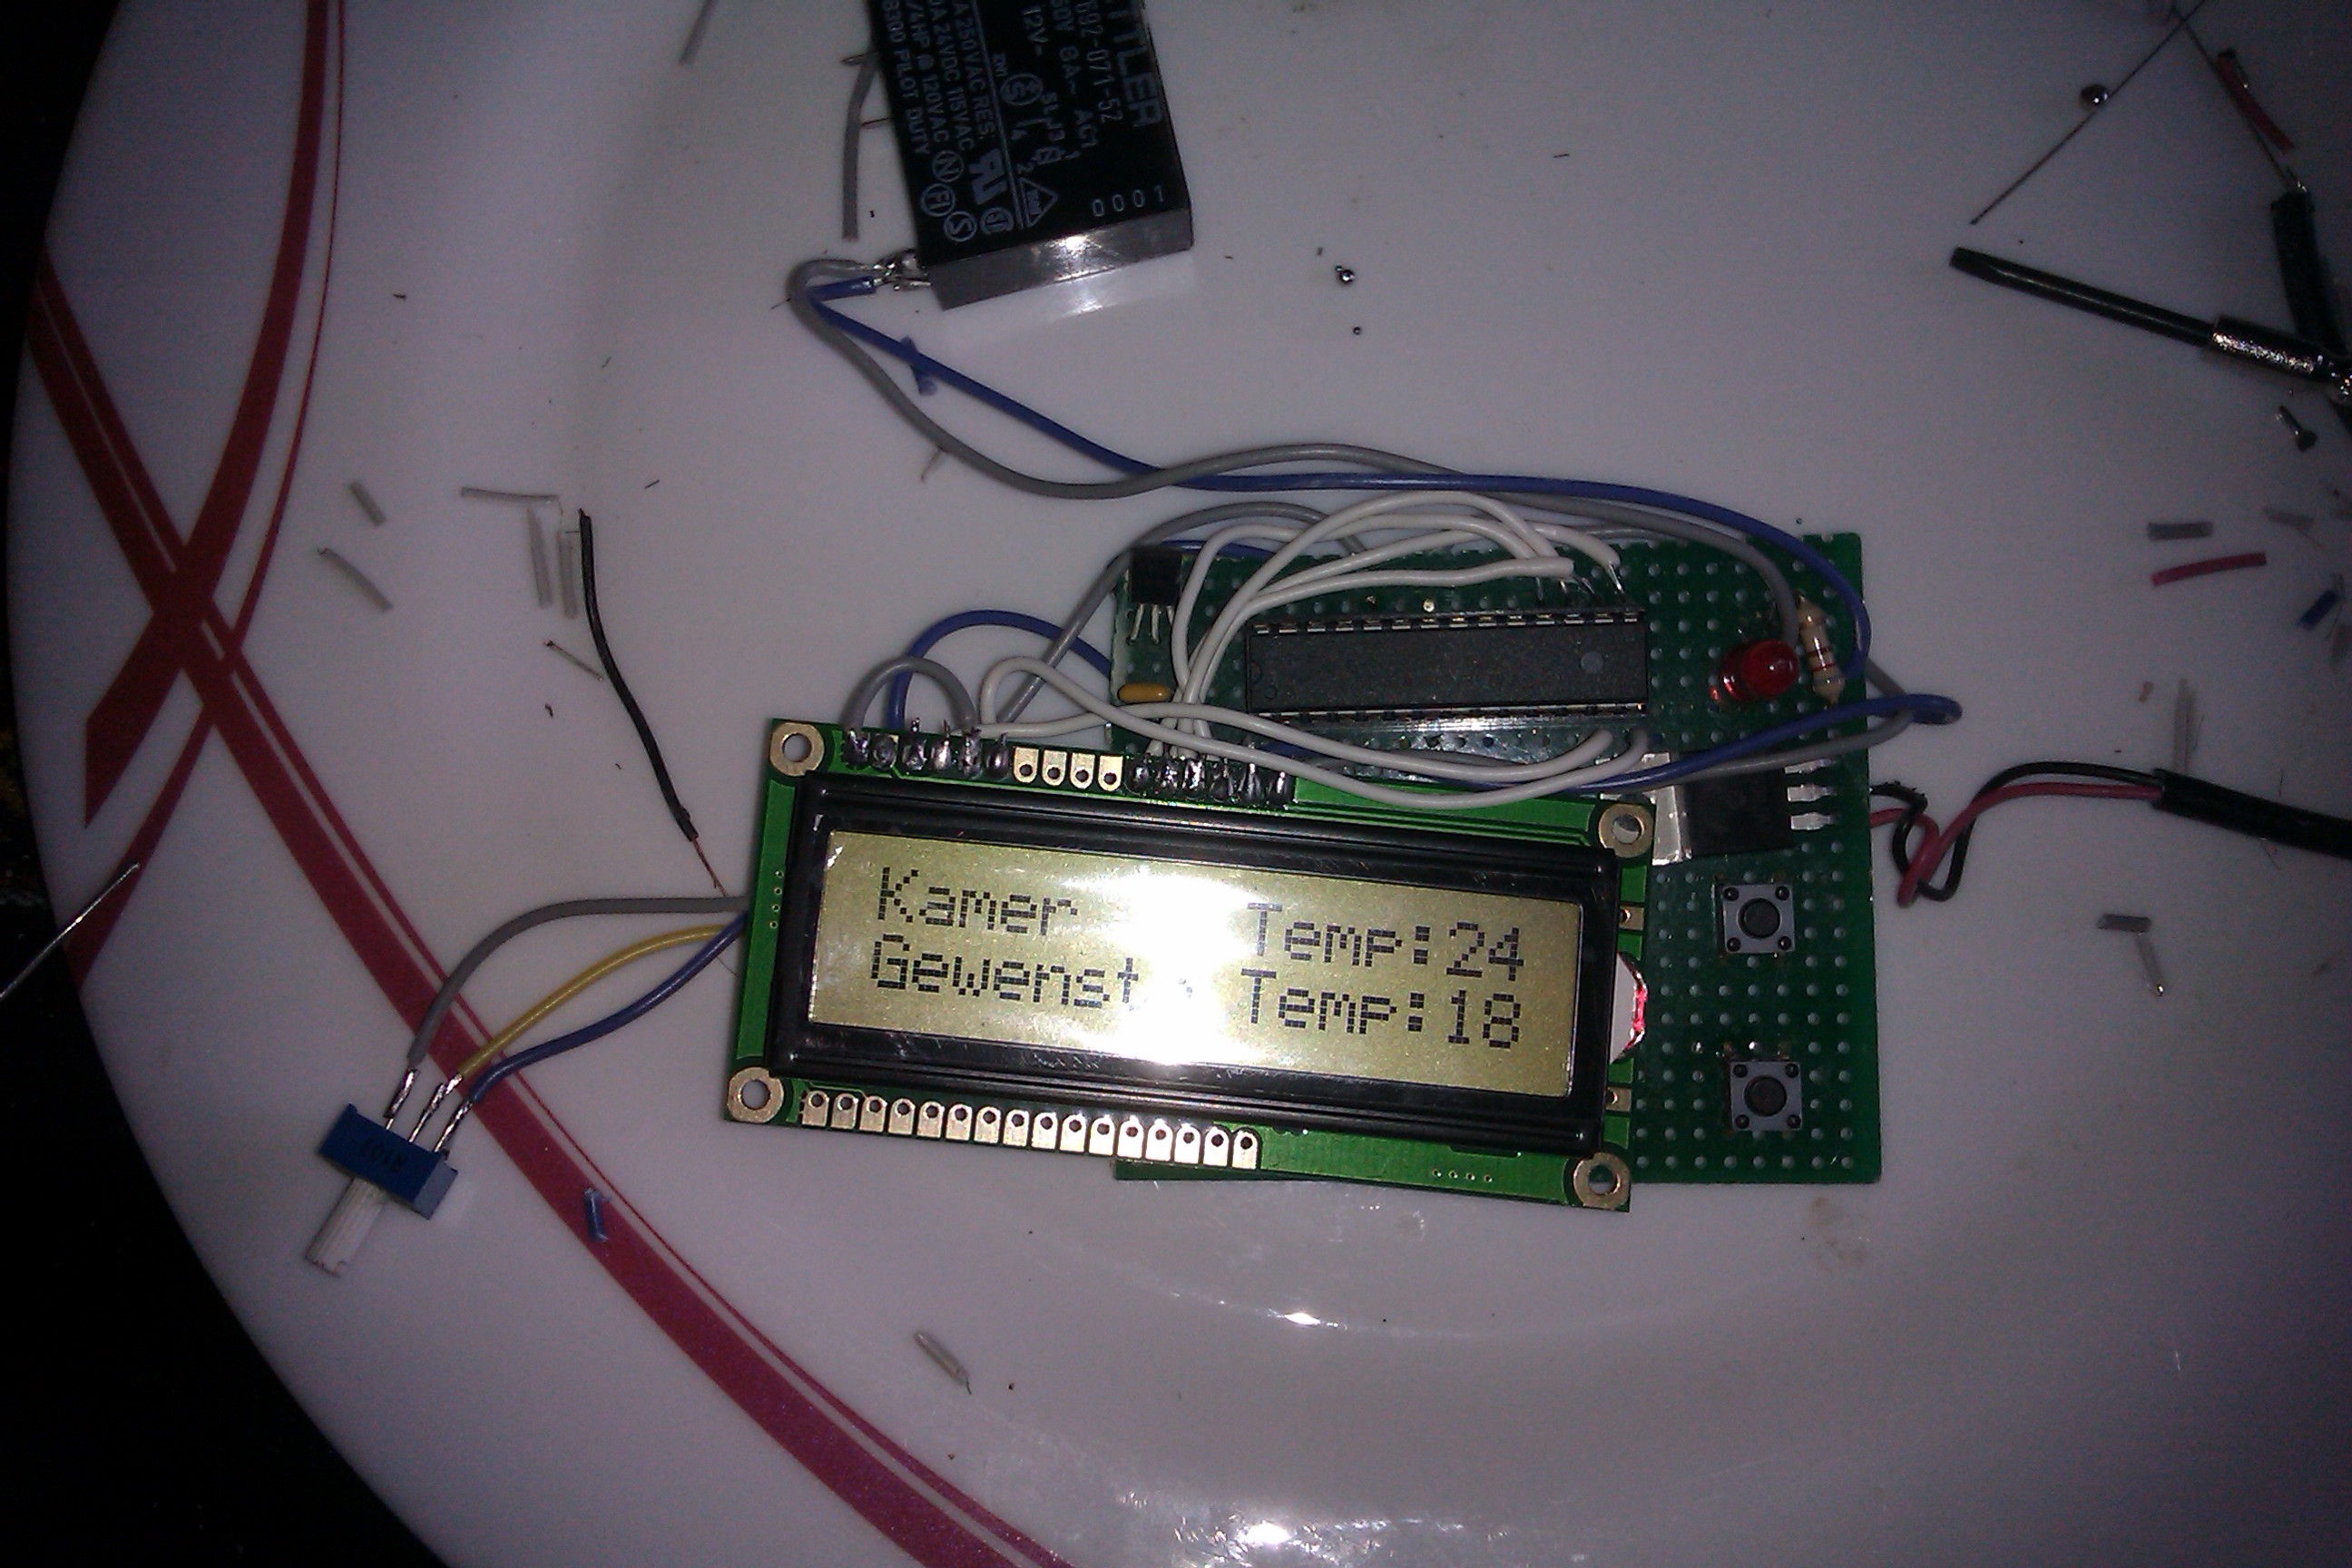
The raspberry pi hit the scene. I immediately bought a few for the many projects I wanted to prototype and began making a more clean version of the Web Thermostat project. I converted the breadboard and arduino into a single pcb (well stripboard with lotsa wires) and a standalone atmega328. I've got 4 wires left to do. +5v and gnd go to supply of the raspberry pi. TX and RX lines will go to the gpio of the raspberry pi (need a level shifter for that to go from 3.3 to 5v and waiting for that order ). Basically allowing me to run the web application on a raspberry pi and then have that control the wanted temperature.
Creating a shield for Raspberry Pi for Web Thermostat V2
Here's a picture of the protoboard based shield that fits onto a raspberry pi's gpio lines:
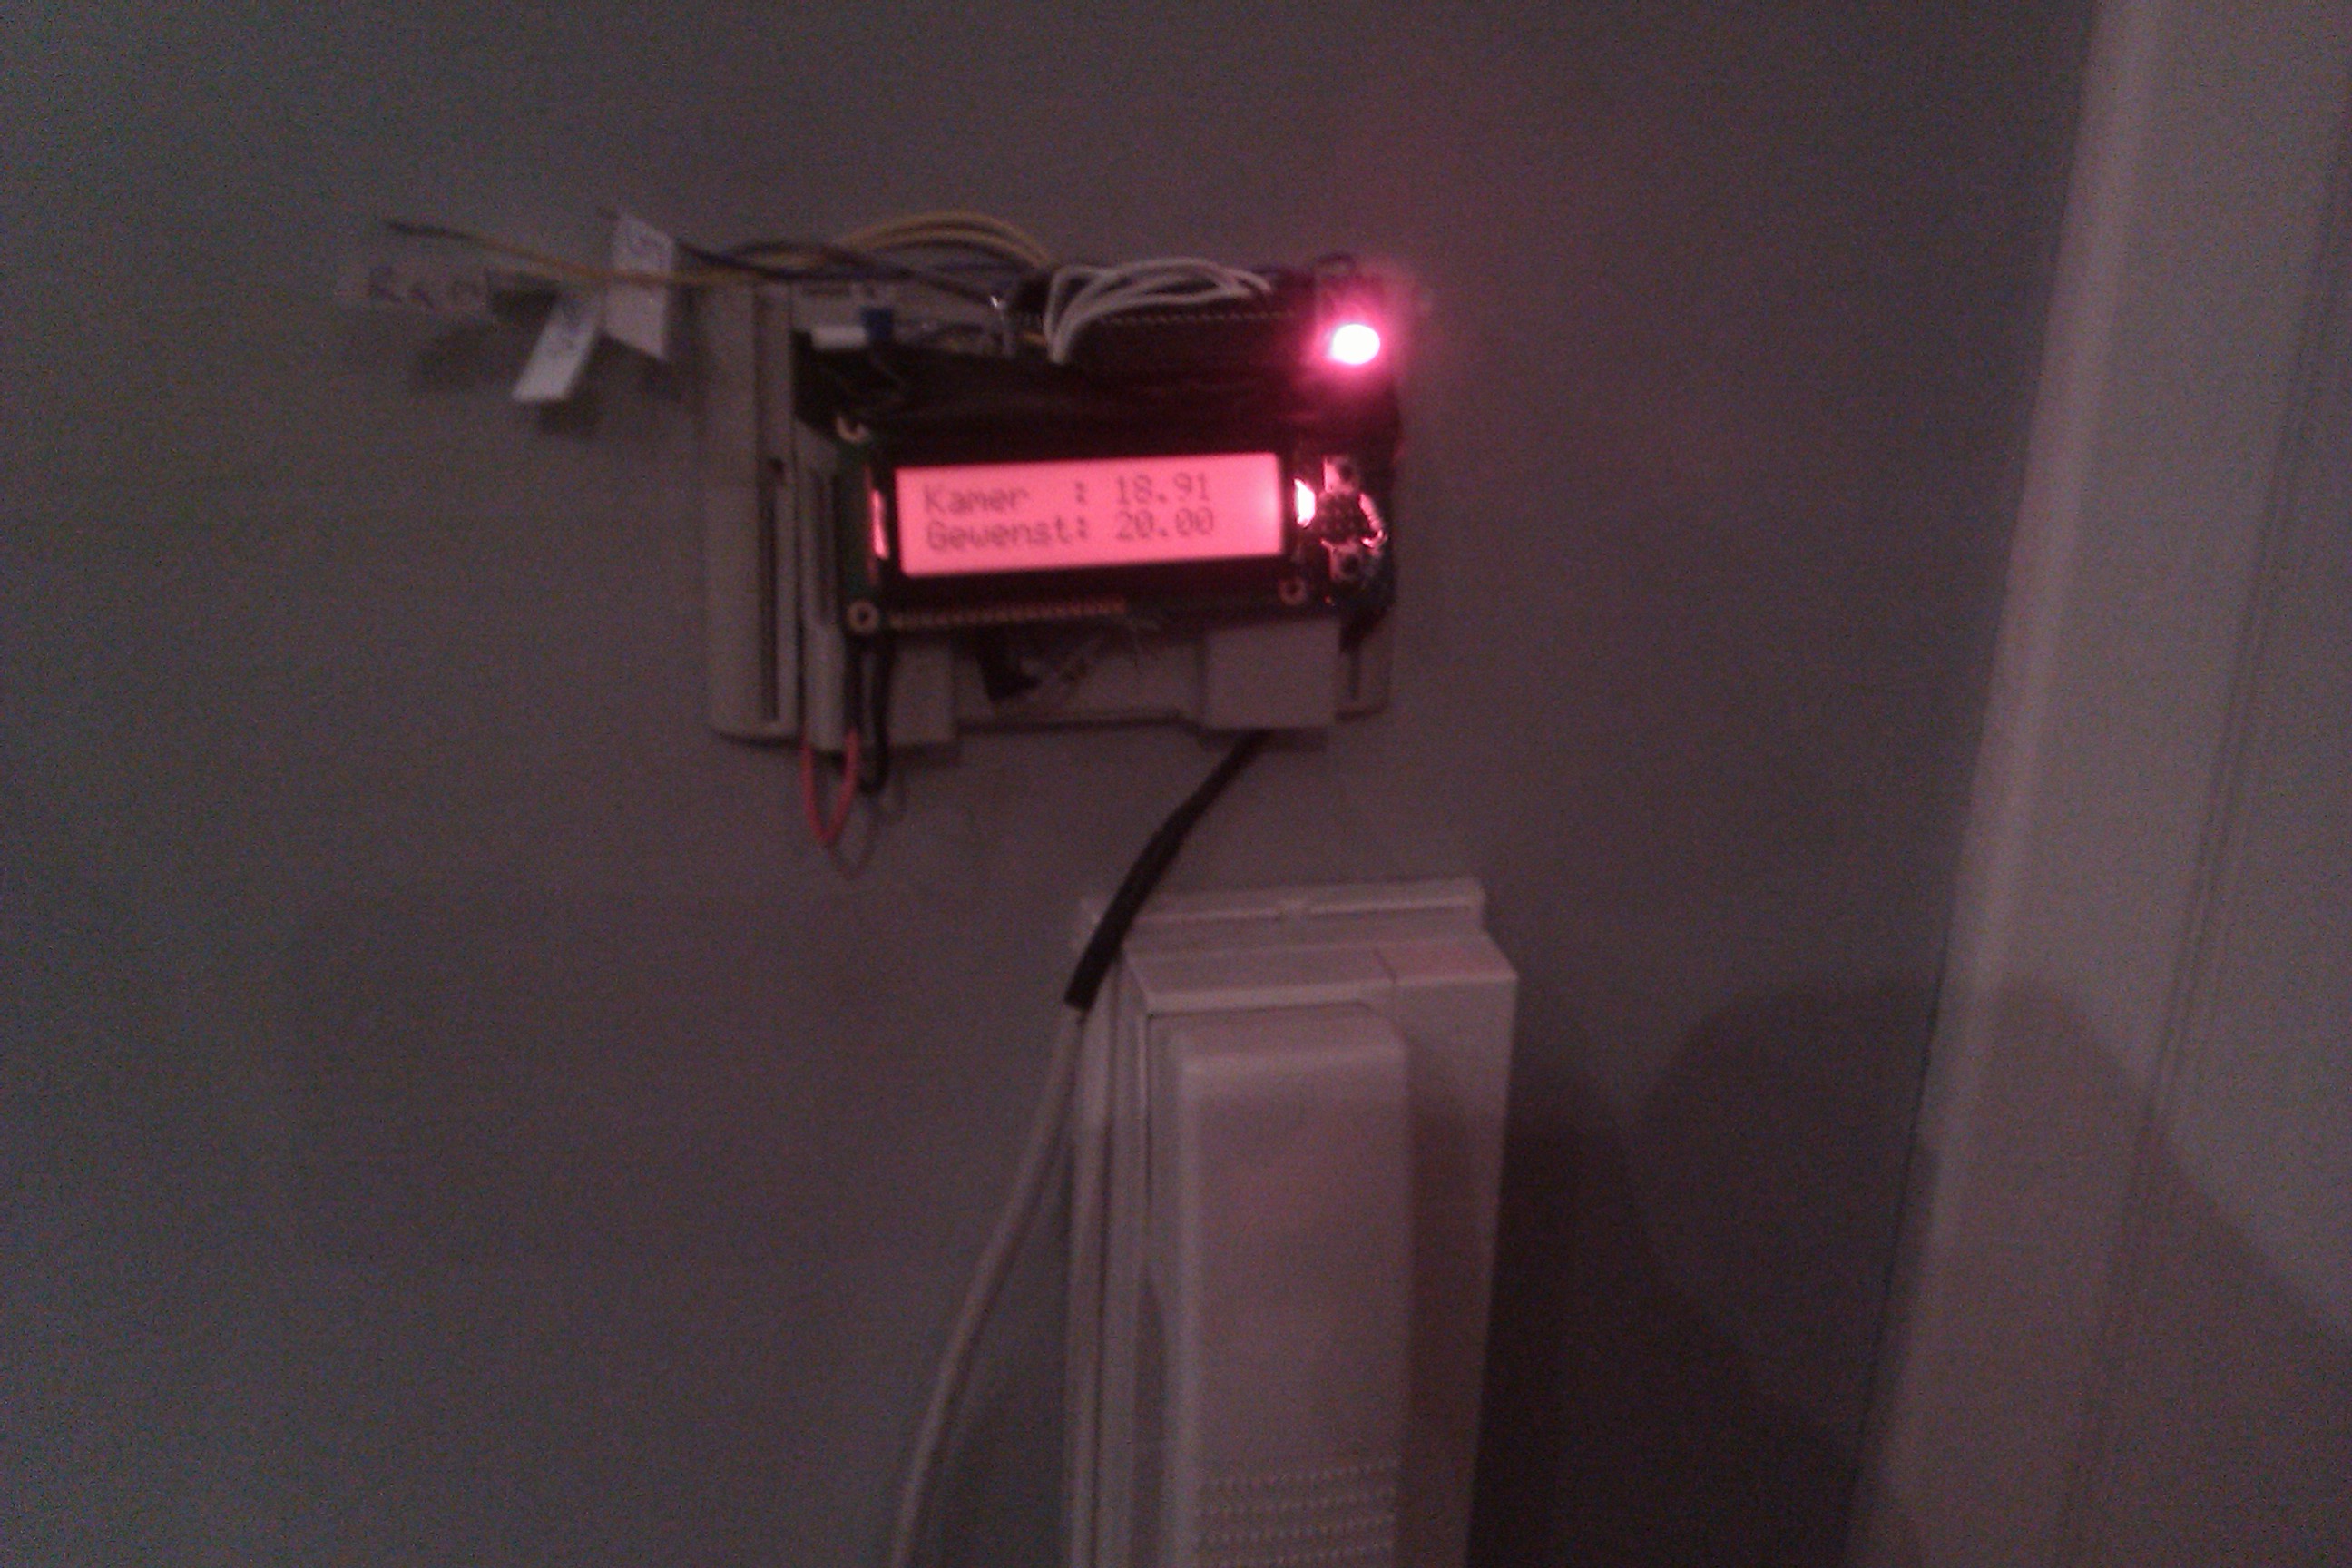
Here's the shield and pi fit onto my wall where my original thermostat was. It still needed an enclosure though and a header to connect the four wires to my raspberry pi. But my 3D printer was at that time not working yet ;). The firmware was already able to run stand-alone as well so I used it as my general home thermostat for a few years as well. Inteface super minimal: just + and - for hotter or colder is all it has. And if you we're on my wifi and knew what IP you could just control it with any smartphone, tablet or pc as well ;).
For v2 I made a youtube video once the hardware shield was working. This was about a year after v1.